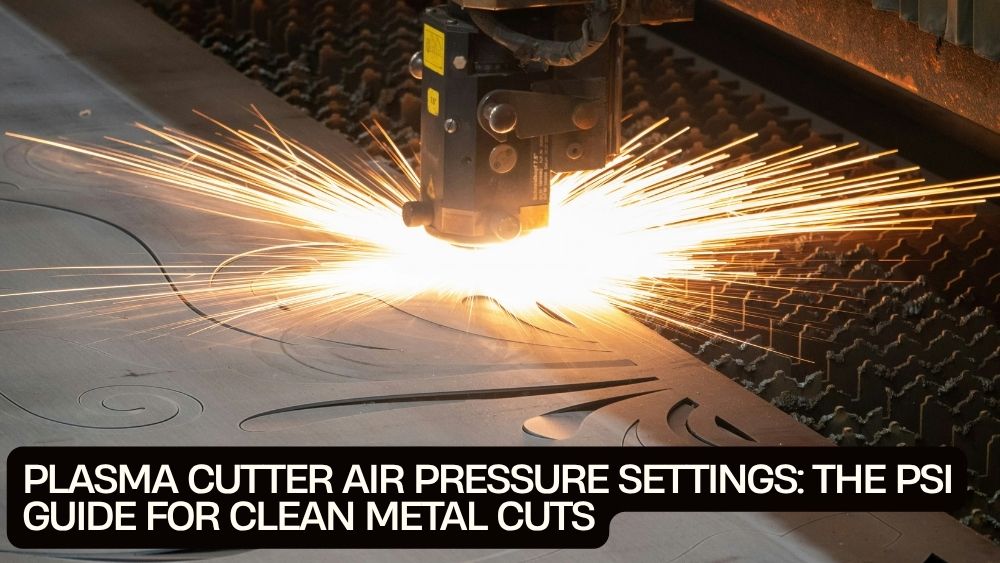
A plasma cutter can slice through metal with impressive precision, but the difference between a clean cut and a messy, slag-covered edge often comes down to a few important settings.
Air pressure is one of them.
Set the pressure too low, and the arc may struggle to cut through the workpiece. Set it too high, and you may experience an unstable arc, poor cut quality, or unnecessary wear on consumables. Even when the PSI looks correct on the gauge, an undersized compressor or moisture-filled air line can still ruin the result.
So, what is the ideal plasma cutter air pressure PSI setting for a clean cut?
The short answer: follow your machine's manual, verify pressure under the specified operating conditions, and make sure your compressor can supply the required airflow. Many conventional air plasma cutters operate somewhere around 60 to 80 PSI, but that is only a broad reference, not a universal setting. For example, some Forney models specify an air-supply range of 60 to 100 PSI, while other machines require different settings.
This guide explains how to set up the air supply, diagnose poor cuts, and get more consistent results in a home garage or professional workshop.
Why Air Pressure Matters in Plasma Cutting
A plasma cutter uses an electrical arc and a stream of gas to cut electrically conductive material. In an air plasma system, compressed air helps form and direct the plasma stream while carrying away molten material from the cut.
The pressure and airflow must match the torch design.
If the supply cannot keep up, the cutter may struggle to maintain a stable arc or clear molten metal effectively. If the pressure exceeds the machine's specified range, the torch may not operate as intended.
The goal is not to use the highest PSI your compressor can produce. It is to deliver the correct air pressure and volume for the cutter and torch.
Three factors work together:
- PSI: The air pressure supplied to the machine or torch, depending on where the manual specifies measurement.
- CFM: The volume of air the compressor can deliver at a given pressure.
- Air quality: The cleanliness and dryness of the air reaching the torch.
A reliable setup needs all three.
What PSI Should You Use for a Plasma Cutter?
There is no single setting that works for every plasma cutter.
Some conventional machines specify torch operating pressure around 60 to 80 PSI. Other models call for lower or higher pressures, depending on torch design and operating requirements. For example, a Lincoln Electric Plasma 20 manual identifies an optimum regulator setting of approximately 65 PSI, while the Forney TRUCUT 357 manual specifies an air-supply range of 60 to 100 PSI.
These examples illustrate why copying another machine's setting can cause trouble.
Before adjusting your cutter, check:
- The required inlet-pressure range.
- The specified airflow in CFM.
- Whether pressure should be checked with air flowing.
- The recommended air-filtering arrangement.
- Any restrictions associated with the torch or consumables.
Important: Do not exceed the machine's maximum inlet pressure, even if your compressor can deliver more.
Static Pressure vs. Flowing Pressure
A gauge may show adequate pressure when the torch is idle, but the pressure can drop once air starts flowing.
This happens when the compressor, hose, regulator, filter, or fittings cannot maintain the required supply under demand.
The result is a misleading reading: the gauge looks healthy, but the cutter behaves as though it is short of air.
If your manual specifies a pressure-setting procedure with air flowing, follow it exactly. Some machines have a dedicated air-test or air-setting mode for this purpose.
PSI Is Only Half the Equation: Check CFM
Imagine two compressors. Both can reach 100 PSI, but one delivers much less air per minute than the other.
They do not provide the same cutting performance.
A plasma cutter needs enough airflow to sustain its intended operating conditions. If the compressor's output is too low, the pressure may drop during cutting even if the tank initially appears full.
Check the compressor's delivered airflow rating at the relevant pressure, not just its maximum PSI or tank size.
Also consider the entire air-delivery system. Undersized hoses, restrictive fittings, clogged filters, and leaks can reduce the amount of air reaching the cutter. Manufacturer guidance warns that undersized air-supply components can hinder plasma-cutter performance.
If your cutter starts well but loses its arc or produces inconsistent cuts during longer passes, insufficient airflow is one possible cause.
Keep the Air Clean and Dry
Moisture and oil can cause problems even when pressure is correct.
Compressed air often contains water vapor, and that moisture can condense as the air cools. Oil or particulate contamination can also travel through the line if the compressor and filtration system are not properly maintained.
Contaminated air may contribute to poor cut quality and premature consumable wear.
To reduce the risk:
- Drain the compressor tank according to its maintenance instructions.
- Inspect and maintain the cutter's built-in air filter.
- Use suitable air filtration and drying equipment where required.
- Check hoses and fittings for contamination or leaks.
- Follow the manufacturer's requirements for oil-free or suitably filtered air.
Forney's manual specifically notes that moisture and oil in the air can damage equipment and recommends additional filtration when conditions require it.
If you see moisture near the torch or on the workpiece, investigate the air supply before adjusting the PSI repeatedly.
Step-by-Step: Setting Plasma Cutter Air Pressure
The exact controls vary by machine, but this general workflow can help you prepare for a clean cut.
Step 1: Read the Machine's Air Requirements
Find the manufacturer's specified pressure and CFM requirements.
Do not substitute the compressor's maximum pressure rating for the cutter's required operating pressure.
Step 2: Check the Compressor
Confirm that the compressor can supply the required airflow at the pressure your cutter needs.
If the compressor is undersized, changing the regulator setting will not create additional airflow.
Step 3: Inspect the Air Line
Check the hose, connectors, regulator, filter, and moisture separator. Look for leaks, kinks, blockages, or components that restrict flow.
Step 4: Set the Supply Pressure
With the machine in the appropriate setup condition, adjust the supply according to the manual.
If the manufacturer specifies setting the pressure while air is flowing, use that method rather than relying on a static reading.
Step 5: Verify Airflow
Use the machine's approved air-test procedure if one is provided. Confirm that the pressure and airflow meet the specifications.
Step 6: Prepare the Workpiece
Clean the cutting area and grounding point as required. Remove coatings or contamination using a suitable method, and ensure the workpiece is properly secured.
Step 7: Test on Scrap Metal
Make a test cut using the correct consumables, current setting, and torch technique for the material.
Inspect the cut before starting the finished piece.
Never adjust internal electrical components or service pressurized equipment while it is energized. Follow the manufacturer's shutdown and maintenance procedure.
How to Recognize Incorrect Air Pressure
Cut quality provides useful clues, but no single symptom proves that the pressure is wrong. Torch consumables, current, travel speed, grounding, material thickness, and air quality can produce similar problems.
Problem: The Cutter Struggles to Cut Through
Possible causes include:
- Insufficient air supply
- Incorrect current setting
- Travel speed that is too fast
- Worn consumables
- Material that exceeds the cutter's capability
- Poor grounding
Check the manual's pressure and airflow requirements first. Then verify the consumables and cutting technique.
Problem: The Arc Starts but Then Stops
An unstable air supply can contribute to arc interruption. Check for pressure drops, leaks, inadequate compressor output, and restricted filters.
Also check the machine's fault indicators and duty-cycle limits.
If the air supply is correct but the problem continues, stop and follow the manufacturer's troubleshooting procedure.
Problem: The Cut Edge Has Excessive Dross
Dross is the material that remains attached to the cut edge after cutting.
Possible causes include incorrect travel speed, unsuitable current, incorrect torch distance, worn consumables, or air-supply problems.
Do not assume that increasing PSI is the answer. Review the machine's recommended cutting settings and adjust one variable at a time.
Problem: The Cut Looks Rough or Angled
A rough or bevelled edge may result from torch angle, travel speed, consumable wear, incorrect cutting height, or insufficient cutting capability for the material thickness.
Check the torch technique and consumables before changing the pressure.
Problem: Consumables Wear Out Too Quickly
Air contamination, incorrect pressure, poor cooling, unsuitable consumables, and improper cutting technique may all contribute.
Inspect the air filter and drying system, and confirm that the torch is operating within the manufacturer's specifications.
Pressure, Amperage, and Travel Speed Must Work Together
Air pressure is not a stand-alone cut-quality control.
Amperage determines the cutting current. Travel speed determines how long the arc acts on each section of metal. Torch height and angle also influence the result.
If you move too quickly, the arc may not cut completely through the workpiece. If you move too slowly, you may create excessive dross or heat the material unnecessarily.
Thicker material generally requires settings and technique appropriate to the cutter's rated cutting capacity. Increasing pressure cannot compensate for a machine that lacks the required cutting capability.
For the best results, use the manufacturer's cutting chart where available and practice on scrap of the same material and thickness.
Choosing a Plasma Cutter for Home Repairs and Workshops
If you're shopping for a plasma cutter, look beyond the headline amperage.
Check the air requirements, input voltage, duty cycle, supported material thickness, torch consumables, and available cutting modes.
The is listed as a dual-voltage machine with a 50A plasma cutter and 200A TIG and stick welding functions.
Its multi-process design may appeal to people who need both cutting and welding capability in a home repair area or workshop.
Before using its plasma-cutting function, verify the exact air-pressure and CFM requirements in the machine's manual. Do not assume that the pressure settings from a different 50A plasma cutter will apply.
Also confirm that your compressor can support the required airflow and that your electrical supply meets the machine's requirements for the selected voltage.
Safety Tips for Clean, Controlled Cuts
Plasma cutting creates intense light, hot metal, sparks, fumes, and electrical hazards. Safe setup is essential.
- Wear appropriate eye and face protection, including the correct welding or cutting shade.
- Use suitable gloves and flame-resistant clothing.
- Keep flammable materials away from sparks and hot metal.
- Provide appropriate ventilation or fume extraction.
- Secure the workpiece before cutting.
- Follow the machine's grounding instructions.
- Inspect air hoses and electrical cables before use.
- Disconnect power and air before performing maintenance as directed by the manufacturer.
- Never cut containers that may contain flammable residues unless they have been professionally assessed and made safe.
Cutting painted, coated, galvanized, or unidentified materials can produce hazardous fumes. Identify the material and coating before cutting, and use appropriate controls.
A Quick Troubleshooting Checklist
Before your next cut, run through this list:
- Pressure: Is it within the machine's specified range?
- Airflow: Can the compressor deliver the required CFM?
- Air quality: Is the air clean and dry?
- Hoses: Are the line, fittings, and filters free of restrictions and leaks?
- Consumables: Are the electrode and nozzle in good condition?
- Grounding: Is the workpiece properly connected?
- Technique: Are current, torch height, and travel speed appropriate?
- Material: Is it within the cutter's rated cutting capacity?
Change one setting at a time and test on scrap. That makes it easier to identify what actually improves the cut.
Final Takeaway
The right plasma cutter air pressure PSI setting for a clean cut is the pressure specified for your particular machine and torch, supported by enough CFM and clean, dry air.
Although some conventional plasma cutters operate around 60 to 80 PSI, that range is only a reference. Your owner's manual takes priority.
If cuts are rough, the arc keeps stopping, or the edge has excessive dross, check the airflow, filters, consumables, grounding, amperage, and travel speed before blindly turning up the regulator.
The VEVOR 3-in-1 plasma cutter and welder combo offers cutting and welding functions in one machine, but a reliable result still depends on correct setup and an air supply that meets the manufacturer's requirements.
Set the pressure to specification, verify the airflow, and let a test cut guide your adjustments. That is the practical route to cleaner edges, fewer interruptions, and more consistent metalwork.