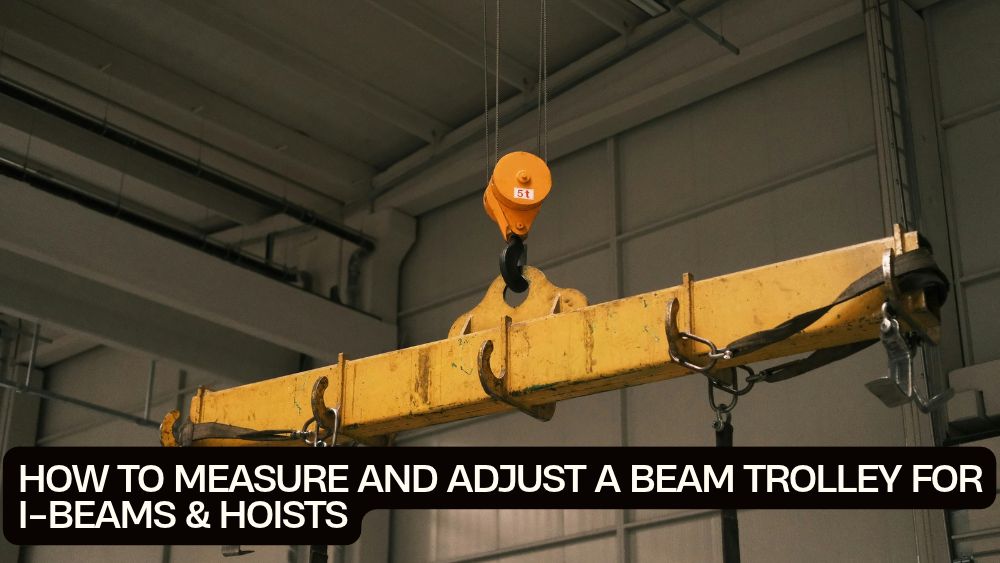
A beam trolley may look like a straightforward piece of workshop equipment: a steel frame, a set of wheels, and a suspension point for a hoist. But getting the fit right takes more than matching the trolley to the approximate width of an I-beam.
The trolley must fit the beam flange correctly, maintain the manufacturer's specified wheel clearance, remain properly centered, and work with a beam structure rated for the intended lifting load.
A trolley that is too narrow may not fit. One adjusted too loosely may track poorly or create excessive movement. Incorrect spacer placement can also affect alignment and suspension geometry.
If you're learning how to adjust beam trolley flange width for steel I-beam installations, this guide explains the measurements, adjustment principles, inspection steps, and common mistakes to avoid.
We'll also look at the adjustable 4,400 lb manual push beam trolley available from TotalFindz and the specifications to check before purchasing.
Understand How a Beam Trolley Fits an I-Beam
A beam trolley is a wheeled carriage that travels along the lower flange of a compatible overhead beam.
A hoist attaches to the trolley's suspension point. This allows an operator to move a suspended load horizontally along the beam, provided the trolley, hoist, beam, and supporting structure are suitable for the application.
A typical lifting arrangement looks like this:
Structural beam → Beam trolley → Hoist → Lifting accessories → Load
Each component has a separate job and a separate set of limitations.
The trolley's wheels sit on the upper surface of the beam's lower flange. Its side plates and wheel geometry help keep the assembly aligned as it travels.
An adjustable trolley uses a mechanism such as spacer washers, sleeves, adjustment nuts, or a threaded adjustment assembly to accommodate different flange widths.
The important point: adjustable does not mean universal. Every trolley has a specified compatibility range, and the beam profile and flange thickness must also be suitable.
Measure the I-Beam Before Adjusting the Trolley
Start with the beam, not the trolley.
Before ordering or installing equipment, identify the beam's dimensions and profile. A tape measure may be enough to obtain basic dimensions, but a qualified person should verify the beam and its supporting structure for the intended lifting application.
The measurements that matter
Flange width: Measure across the full width of the lower flange, from one outer edge to the other. This is the primary dimension used to determine whether the trolley's adjustment range is suitable.
Flange thickness: Measure the thickness of the lower flange. Trolley wheel and side-plate geometry must accommodate the actual beam thickness.
Beam depth: Measure from the top of the beam to the bottom of the lower flange. This helps identify the beam section and check installation clearances.
Beam profile: Determine whether the beam is an I-beam, S-beam, W-beam, or another structural section. Flange shape matters because some beams have tapered surfaces while others have relatively parallel flanges.
Available clearance: Check the space around the beam for the trolley body, hoist, suspension hardware, end stops, nearby structure, and any obstructions along the travel path.
How to measure flange width
-
Make the work area safe and ensure no load is suspended from the beam.
-
Identify the lower flange where the trolley wheels will travel.
-
Position a measuring tape or suitable measuring tool across the flange.
-
Measure from the outside edge to the opposite outside edge.
-
Repeat the measurement at another accessible point.
-
Record the measurement in inches or millimeters.
-
Check for damaged edges, deformation, corrosion, or other conditions that could affect trolley travel.
Do not measure the beam's overall depth and mistake it for flange width. They are different dimensions.
If the beam has a tapered flange, unusual geometry, or significant wear, have its compatibility assessed rather than relying on a single width measurement.
Check the Trolley's Adjustable Flange Width Range
Once you know the beam dimensions, compare them with the trolley's published specifications.
For example, the TotalFindz Manual Push Beam Trolley, rated at 4,400 lb is listed with an adjustable beam-width range of 2.4 to 7 inches (61–178 mm).
Its listed specifications include:
| Specification | Listed Details |
|---|---|
| Rated capacity | 4,400 lb (2 tons) |
| Adjustable beam width | 2.4–7 in (61–178 mm) |
| Frame material | Q235 carbon steel |
| Wheel type | Dual cast steel wheels |
| Product dimensions | 10.24 × 9.25 × 9.65 in |
| Product weight | 19.7 lb (8.95 kg) |
| Adjustment components | Spacer set and sleeves |
| Package | Trolley, spacer set, installation hardware, user manual |
These are listing specifications. Confirm the actual product manual and identification plate before installation.
Why the adjustment range matters
Suppose your beam flange measures 5 inches wide.
That measurement falls within the product's listed 2.4–7-inch adjustment range. It makes the trolley a potential candidate, but it does not establish that the trolley is suitable for the beam.
You must still verify:
-
Flange thickness
-
Beam profile and wheel compatibility
-
Manufacturer's required wheel clearance
-
Suspension and spacer arrangement
-
Rated capacity for the application
-
Structural capacity of the beam and its supports
A matching width is only the first compatibility check.
How to Adjust Beam Trolley Flange Width for a Steel I-Beam
The TotalFindz product listing describes adjustment using spacers and sleeves. The exact assembly sequence, hardware arrangement, and tightening requirements must come from the manual supplied with the specific trolley.
The following explains the adjustment principles. It is not a substitute for the model-specific installation instructions.
Step 1: Identify the adjustment components
Lay out the trolley components and identify the side plates, wheel assemblies, suspension section, spacers, sleeves, nuts, and locking hardware.
Check that all supplied parts are present and undamaged.
Do not substitute homemade spacers, ordinary washers, or hardware that the manufacturer has not approved.
Step 2: Confirm the measured flange width
Use the recorded flange measurement and compare it with the trolley's adjustment range.
Do not estimate the width by eye.
If the measurement is outside the specified range, stop. Do not force the trolley onto the beam or attempt to extend its adjustment using extra hardware.
Step 3: Consult the trolley's spacer arrangement
Adjustable push trolleys use different systems.
Some models require spacers to be repositioned between the side plates and suspension assembly. Others use threaded adjustment mechanisms or a combination of sleeves and washers.
Follow the exact manufacturer's diagram.
Where the design requires equal spacer arrangements on opposite sides, maintain that symmetry. The suspension point must remain centered as specified by the manufacturer.
Step 4: Establish the specified wheel clearance
The distance between the trolley's wheel flanges and the beam edges must follow the manufacturer's instructions.
Do not assume that every trolley uses the same clearance.
For example, published instructions for different trolley models specify different fitting methods and clearances. Some manuals describe approximately 1/8-inch clearance, while others use different measurement conventions.
The correct target for your trolley is the one in its own manual, not a number copied from another model.
Step 5: Secure the adjustment hardware
Once the required spacer configuration has been established, tighten and secure the adjustment hardware using the manufacturer's specified method.
Use the specified locking nuts, retaining pins, or other locking components.
Do not guess a torque value or use a generic tightening instruction. If the manual specifies a torque, follow it with suitable tools.
Step 6: Recheck alignment
Before installation or operation, verify that:
-
The side plates are correctly positioned.
-
The suspension point is centered as specified.
-
The spacer arrangement is correct.
-
The wheels are aligned.
-
The specified clearance is maintained.
-
All retaining and locking hardware is secure.
If anything appears uneven, binds, or does not match the manual's illustrations, stop and resolve the issue before use.
What Does Correct Trolley Clearance Look Like?
Correct clearance allows the trolley to travel along the beam without binding while keeping the wheel assemblies properly positioned.
Too little clearance can cause friction, binding, and difficult movement.
Too much clearance can produce unwanted lateral movement or incorrect alignment.
However, there is no single clearance measurement that applies to every trolley design.
The manufacturer's specified clearance may refer to the gap between the wheel flange and beam edge, the distance between wheel assemblies, or another defined measurement.
Make sure you understand which dimension the manual is describing.
Signs that the trolley may be incorrectly adjusted
Look for:
-
Wheels rubbing against the beam edges
-
Side plates sitting unevenly
-
Excessive side-to-side movement
-
Wheels that do not sit correctly on the flange
-
Binding during unloaded movement checks
-
Suspension hardware that is not centered
-
Spacers that do not match the manufacturer's arrangement
Never solve a fit problem by simply loosening the assembly until the trolley moves. The goal is the correct fit, not just easier movement.
Install the Trolley on the Beam Safely
Installing an overhead trolley can involve awkward, heavy components. Use a planned installation method and appropriate lifting equipment.
A qualified person should determine whether the trolley can be installed from an accessible beam end or whether another approved installation method is required.
Before installation:
-
Isolate the work area.
-
Remove suspended loads and secure the lifting equipment.
-
Inspect the beam and its supports.
-
Confirm the trolley's adjustment and compatibility.
-
Check the installation instructions.
-
Arrange suitable assistance and handling equipment.
-
Protect people from falling objects and pinch points.
After positioning the trolley, confirm that the wheels sit correctly on the lower flange and that all hardware is secured according to the manual.
Install required end stops and other travel-limiting devices specified for the runway.
Do not assume that the trolley's side plates alone provide adequate protection against running off the end of a beam.
Check the Hoist and Total Lifting Capacity
A trolley rated for 4,400 lb does not automatically make the complete lifting system safe for a 4,400 lb load.
The hoist, lifting accessories, beam, connections, supporting columns, and building structure must all be suitable for the intended load and operating conditions.
For example, a 4,400 lb trolley cannot compensate for a beam that is not designed to support the load.
Before use, verify:
-
Trolley rated capacity
-
Hoist rated capacity
-
Hook and lifting accessory ratings
-
Beam and support capacity
-
Applicable load limits and operating conditions
-
Required inspections and documentation
The total load calculation must account for the suspended equipment and accessories as required by the applicable design and safety rules.
Avoid side pulling, shock loading, swinging loads, or using the trolley to drag a load that is obstructed.
Perform Initial Checks Before Lifting
After installation, carry out the checks required by the trolley and hoist manufacturers and applicable workplace procedures.
An unloaded movement check can help identify obvious alignment or binding problems, but it does not certify the equipment for lifting.
A qualified person should verify the installation and determine whether further inspection, commissioning, or testing is required.
Inspection checklist
| Inspection Point | What to Check |
|---|---|
| Beam flange | Correct profile, condition, and compatibility |
| Wheel assemblies | Correct seating and visible condition |
| Side plates | Alignment and damage |
| Spacers and sleeves | Correct arrangement |
| Locking hardware | Secure and correctly installed |
| Suspension point | Correct position and condition |
| Travel path | Clear of obstructions |
| End stops | Installed where required |
| Hoist | Correct capacity and condition |
| Identification | Rating and required markings readable |
If the trolley binds, moves unevenly, or shows signs of damage, remove it from service until the issue has been evaluated.
Common Beam Trolley Adjustment Mistakes
Even a well-made trolley can become unsafe when it is incorrectly matched or installed.
Avoid these common errors.
Guessing flange width: A visual estimate is not a reliable measurement. Measure the actual lower flange.
Ignoring flange thickness: Width alone does not confirm compatibility. Wheel and side-plate geometry must suit the beam.
Using the wrong spacer arrangement: Unequal or incorrectly positioned spacers can affect alignment and suspension geometry.
Copying clearance from another trolley: Different models use different adjustment systems. Follow the manual for the exact unit.
Adding non-approved washers: Do not extend the trolley's adjustment range with improvised hardware.
Ignoring beam capacity: A trolley's rated capacity does not establish the capacity of the overhead structure.
Skipping inspection: Damaged wheels, loose hardware, worn bearings, or defective side plates can compromise operation.
Testing with a heavy load immediately: Initial checks and commissioning must follow the manufacturer's and applicable safety requirements. Never use an improvised heavy load test.
How to Maintain a Beam Trolley
Regular inspection helps identify wear before it becomes a serious problem.
The inspection frequency should reflect the manufacturer's requirements, operating conditions, and applicable regulations.
Pay attention to:
-
Wheel tread and flange condition
-
Bearing condition and lubrication requirements
-
Side plates and suspension components
-
Spacer assemblies and locking hardware
-
Cracks, bending, corrosion, or deformation
-
Identification and capacity markings
-
Unusual noise or resistance during travel
Keep the trolley clean and lubricate components only as directed by the manufacturer.
If a load-bearing component is repaired, replaced, or altered, have the trolley evaluated by a qualified person. Additional inspection or testing may be required before returning it to service.
Frequently Asked Questions
How do I measure an I-beam for a beam trolley?
Measure the full width of the lower flange from edge to edge. Also identify the flange thickness, beam depth, and beam profile. Compare these measurements with the trolley manufacturer's compatibility specifications.
How do I adjust beam trolley flange width?
The method depends on the trolley design. Some models use spacer washers and sleeves, while others use threaded adjustment systems. Follow the exact manual to position the components, establish the required clearance, center the suspension assembly, and secure the hardware.
What is the correct clearance between trolley wheels and an I-beam?
There is no universal clearance for all beam trolleys. The correct value and measurement reference are specified by the trolley manufacturer. Do not apply a clearance from another model without confirmation.
Can one adjustable beam trolley fit different I-beam sizes?
It can fit different beam widths within its approved adjustment range, provided the beam profile, flange thickness, wheel geometry, and other compatibility requirements are also satisfied.
What is the beam width range of the TotalFindz 4,400 lb trolley?
The TotalFindz listing specifies an adjustable beam-width range of 2.4–7 inches (61–178 mm). Confirm the supplied manual and product identification before installation.
Does a 4,400 lb trolley mean my I-beam can lift 4,400 lb?
No. The trolley rating is only one part of the lifting system. The beam, supporting structure, hoist, lifting accessories, and connections must all be suitable for the intended load.
Final Thoughts
Learning how to adjust beam trolley flange width for steel I-beam installations starts with accurate measurements and the correct equipment specifications.
Measure the lower flange, check the beam profile and thickness, and confirm that the trolley's adjustment range covers the actual dimensions. Then follow the model-specific spacer or adjustment instructions, maintain the required wheel clearance, and verify that the suspension assembly is correctly aligned.
The TotalFindz manual push beam trolley is listed with a 4,400 lb capacity and a 2.4–7-inch adjustable beam-width range. Those specifications make it worth evaluating for compatible workshop and industrial applications, but they do not replace a proper beam and lifting-system assessment.
Above all, treat overhead lifting as an engineered system. Correct adjustment, suitable equipment, qualified installation, and regular inspection all matter.
Measure accurately, follow the manufacturer's instructions, and never put a suspended load over a system whose capacity and compatibility have not been verified.