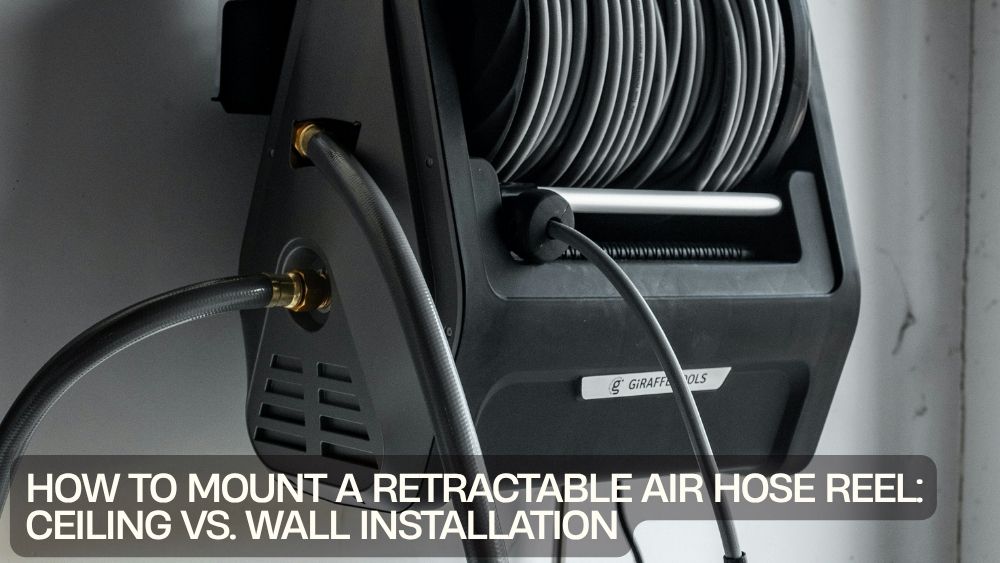
A retractable air hose reel can make a garage feel instantly more organized. Instead of dragging 50 or 100 feet of hose across the floor, you pull out what you need, finish the job, and let the reel bring the hose back into place.
But there is one decision that matters before you start drilling:
Should you mount the retractable air hose reel on the wall or ceiling?
The answer depends on your garage layout, ceiling height, hose reach, mounting surface, compressor location, and the way you use compressed air.
For many home garages, a wall-mounted reel is easier to install and maintain. Ceiling mounting, however, can provide excellent coverage when the work area is open and you want the hose to approach tools from above.
This guide explains the ceiling vs wall mount retractable air hose reel garage decision, including mounting locations, hardware, installation steps, safety considerations, hose routing, and practical setup tips.
Ceiling vs. Wall Mount: Which Setup Makes More Sense?
Both mounting positions can work well, but they solve slightly different problems.
A wall-mounted reel keeps installation relatively straightforward. It is often convenient when the compressor sits near a wall and when most pneumatic work happens along one side of the garage.
A ceiling-mounted reel can free up wall space and provide a more central hose drop. This can be useful in garages where vehicles, workbenches, and tools occupy different areas.
Here is the basic comparison:
| Feature | Wall Mount | Ceiling Mount |
|---|---|---|
| Installation | Usually simpler | Usually more involved |
| Access for maintenance | Easy | Less convenient |
| Floor clearance | Excellent | Excellent |
| Wall space | Uses wall space | Preserves wall space |
| Hose coverage | Good near mounting wall | Potentially excellent across open area |
| Compressor proximity | Often easier | May require longer air line |
| Structural requirements | Solid wall/vertical support | Secure overhead structure essential |
| Best for | Home garages, workshops, fixed work zones | Open garages, central work areas |
| Adjustability | Often easier | Depends on mounting design |
There is no universal winner.
The right position is the one that gives you useful hose coverage while keeping the reel securely supported and the hose away from sharp edges, vehicles, doors, and walking paths.
1. Start by Planning Your Hose Coverage
Do not choose the mounting location simply because you found an empty wall.
First, identify where you actually use compressed air.
Think about:
- Tire inflation
- Impact wrenches
- Air ratchets
- Blow guns
- Pneumatic nailers
- Spray equipment
- Automotive work
- Cleaning
- Workbench projects
Stand roughly where you normally work and imagine the hose extending from the proposed reel location.
You want enough reach to access your main work zones without stretching the hose to its absolute limit.
A 100-foot hose, for example, gives you plenty of length, but that does not mean every foot should be treated as usable working distance. Some length may be consumed by the route from the compressor to the reel and the path around obstacles.
2. Measure Before You Drill
This is the boring step that saves you from the exciting step of drilling the wrong holes.
Measure:
- Distance from compressor to reel.
- Distance from reel to primary work areas.
- Reel mounting dimensions.
- Ceiling height if mounting overhead.
- Clearance around the reel.
- Hose travel path.
- Nearby doors and garage-door components.
- Vehicle clearance.
For a wall installation, check whether the hose will naturally pull outward from the reel.
For a ceiling installation, check how low the reel will hang and where the hose will travel when fully extended.
Remember that a hose reel is not just a box attached to a surface. It is a moving mechanical component that experiences pulling forces every time you extend the hose.
3. Choose a Structurally Sound Mounting Surface
This is the most important installation consideration.
A fully loaded retractable hose reel can place significant force on its mounting points, particularly when the hose is pulled at an angle.
Do not assume that any convenient surface is strong enough.
For Wall Mounting
Suitable mounting locations may include:
- Structural studs
- Solid masonry
- Concrete
- Properly reinforced framing
If mounting to wood framing, use fasteners appropriate for the structure and the reel's mounting requirements.
If you are mounting to masonry, use anchors specifically rated for the material and expected load.
Avoid relying on thin drywall alone unless the reel manufacturer specifically provides an approved mounting method for that installation.
For Ceiling Mounting
Ceiling mounting deserves even more attention.
You need to know what is actually above the mounting surface.
A finished ceiling may hide:
- Joists
- Beams
- Trusses
- Blocking
- Electrical wiring
- Plumbing
- Ductwork
The reel should be attached to structural material capable of supporting it.
If the ideal location does not line up with suitable framing, install appropriate structural reinforcement rather than improvising with weak anchors.
4. Wall-Mount Installation: Step by Step
A wall-mounted reel is generally the simpler option for a home garage.
Step 1: Find the Mounting Location
Choose a location that provides the required hose coverage without interfering with doors, shelves, vehicles, or workbenches.
Keep the reel at a practical height.
You should be able to inspect and maintain it without needing a ladder every time.
Step 2: Locate Structural Support
Use a stud finder where appropriate, or otherwise identify solid structural material.
Mark the mounting points according to the reel's mounting plate or bracket.
Do not guess the hole spacing.
Step 3: Mark and Drill
Hold the reel or mounting bracket in its intended position.
Use a level to ensure the reel is correctly aligned.
Mark the holes, then drill using the appropriate bit for the mounting surface.
Step 4: Install the Fasteners
Use hardware appropriate for the structural material.
Tighten the fasteners securely, but follow the manufacturer's instructions rather than simply applying maximum force.
Over-tightening can damage some mounting components or substrates.
Step 5: Attach the Reel
Once the mounting hardware is secure, attach the reel.
Check that it sits firmly and does not shift when moderate hand pressure is applied.
Step 6: Test Hose Movement
Pull the hose out slowly.
Check that it extends smoothly and that the reel does not move on the wall.
Then allow the hose to retract under controlled conditions.
Do not simply release it and let the reel slam the hose back into the housing.
5. Ceiling-Mount Installation: Step by Step
Ceiling installation can produce excellent hose coverage, but it requires more planning.
Step 1: Identify Structural Support
Locate a ceiling joist, beam, truss, or properly installed reinforcement.
Never assume the ceiling finish itself can carry the reel.
Step 2: Check Vertical Clearance
Measure the distance from the mounting surface to the bottom of the reel.
Then consider the height of vehicles, garage doors, lighting fixtures, and shelving.
You do not want the reel becoming an unexpected obstacle.
Step 3: Position the Reel
Choose a location where the hose can drop naturally toward your work area.
A central position may provide better coverage, but only if it can be structurally supported.
Step 4: Secure the Mounting Hardware
Install the specified hardware into the structural support.
For overhead installations, every mounting point matters.
If you are uncertain about the load capacity of the structure, have the mounting arrangement evaluated before installation.
Step 5: Test the Reel Carefully
Pull the hose out gradually while watching the mounting connection.
Pay attention to movement, twisting, or flexing.
The reel should remain firmly supported.
Step 6: Check the Entire Hose Path
Move around the garage with the hose extended.
Look for contact with:
- Garage doors
- Sharp corners
- Shelving
- Vehicle bodywork
- Electrical equipment
- Hot surfaces
- Moving machinery
A ceiling-mounted reel can provide impressive reach, but the hose still needs a safe route.
6. Consider the Compressor-to-Reel Connection
The reel's mounting position is only half the installation.
You also need to plan the air supply line.
If the compressor is located on one wall and the reel is installed on the opposite side or ceiling, the air line may need to travel a considerable distance.
Keep the supply line protected and routed neatly.
Avoid placing it where vehicles can drive over it or where people can trip over it.
Use appropriate fittings and thread-sealing practices recommended for compressed-air systems.
After connecting everything, inspect the system for leaks before regular use.
7. How High Should You Mount an Air Hose Reel?
There is no universal mounting height.
The ideal position depends on the reel, garage, ceiling height, and hose path.
For wall mounting, install the reel high enough to keep it out of the way while remaining accessible for inspection and maintenance.
For ceiling mounting, the reel needs sufficient clearance from vehicles and moving garage-door components.
The hose should be able to reach your work area without requiring excessive lateral pulling.
A useful rule is:
Mount for hose access, not just visual neatness.
A beautifully mounted reel that constantly forces you to pull the hose sideways is not a well-planned installation.
8. Think About Hose Pull Direction
This detail is easy to overlook.
Retractable reels work best when the hose follows a sensible path from the reel.
If you constantly pull the hose sharply sideways, you may increase stress on the reel and hose.
Before permanently mounting the reel, simulate the hose movement.
Pull it toward your:
- Front vehicle tires
- Rear vehicle tires
- Workbench
- Garage entrance
- Tool station
- Cleaning area
If the hose naturally reaches these zones, your mounting position is probably working well.
If you repeatedly fight the hose, move the reel before drilling.
9. Product Example: 3/8-Inch, 100-Foot Retractable Air Hose Reel
For a larger garage or workshop, hose length becomes an important consideration.
The VEVOR retractable air hose reel with a 3/8-inch × 100-foot rubber hose is designed around a long working range and is listed with a maximum pressure of 300 PSI.
VEVOR 3/8-Inch × 100-Foot Retractable Air Hose Reel

That combination can make thoughtful placement particularly important.
A long hose gives you flexibility, but it also gives you more hose to route and manage.
Do not confuse the reel's maximum pressure rating with the pressure requirement of your specific tools. Always follow the pressure limits of the hose, reel, fittings, compressor, and pneumatic equipment being used.
10. Ceiling Mount vs. Wall Mount for Different Garages
Small Home Garage
Wall mounting often makes sense when the compressor and workbench are already positioned along the same wall.
It keeps the installation relatively accessible and simplifies maintenance.
Two-Car Garage
Ceiling mounting can be useful when you need hose coverage across a larger open area.
However, structural support and vehicle clearance become especially important.
Automotive Workshop
Consider where vehicles will be positioned.
A reel mounted near the center can potentially provide broad access, while a wall-mounted reel may work better if most repairs happen in one service bay.
DIY Workshop
Wall mounting can be convenient if the reel serves a dedicated workbench.
Ceiling mounting becomes more interesting if pneumatic tools are used throughout the room.
11. Common Installation Mistakes to Avoid
Mounting Directly to Weak Drywall
The reel needs solid structural support.
Ignoring Garage-Door Movement
A ceiling-mounted reel must not interfere with the garage door or its hardware.
Installing Too Low
A low reel can become an obstacle and may interfere with vehicles.
Mounting Too High on the Wall
If you cannot comfortably inspect or service the reel, routine maintenance becomes harder.
Pulling the Hose Around Sharp Corners
Sharp edges can damage the hose over time.
Using Incorrect Fasteners
The mounting surface determines the appropriate hardware.
Ignoring Hose Retraction
Allowing a retractable hose to snap back uncontrolled can damage equipment or create a safety hazard.
Forgetting Compressor Location
A great reel position can become a terrible installation if the air supply line has to cross the entire garage.
12. How to Test Your Installation
Once installed, do not immediately put the system into full-time service.
Perform a controlled test.
First, inspect the mounting hardware.
Then check the air connections.
Pressurize the system according to the equipment instructions.
Listen for leaks.
Next, extend the hose gradually.
Check whether the reel remains stable.
Test the hose at several angles and distances.
Finally, retract the hose slowly and confirm that it winds evenly.
If anything shifts, rubs, leaks, or behaves unexpectedly, stop and correct the problem before normal use.
Ceiling or Wall? Use This Quick Decision Guide
Choose wall mounting when:
- The compressor is near a wall.
- Your main work area is along one side of the garage.
- Easy maintenance matters.
- You have solid wall framing available.
- You want a straightforward installation.
Consider ceiling mounting when:
- You need coverage across an open workspace.
- Wall space is limited.
- A suitable structural mounting point exists overhead.
- You can maintain adequate vehicle and door clearance.
- You are comfortable installing secure overhead hardware.
The important word is consider.
Ceiling mounting should never be chosen simply because it looks cleaner. Structural support and safe clearance come first.
Final Installation Checklist
Before calling the job finished, check:
-
Mounting surface is structurally suitable
-
Correct mounting hardware is installed
-
Reel is level and firmly secured
-
Compressor connection is properly routed
-
Air fittings are secure
-
Hose does not rub against sharp edges
-
Hose reaches the intended work zones
-
Vehicle clearance is adequate
-
Garage-door movement is unobstructed
-
Reel retracts smoothly
-
Hose does not snap back uncontrolled
-
System has been checked for air leaks
-
Manufacturer pressure limits are followed
Final Thoughts
The ceiling vs wall mount retractable air hose reel garage decision really comes down to three things: structure, reach, and workflow.
A wall-mounted reel is often practical for garages with a defined work area and accessible wall framing. A ceiling-mounted reel can make sense when you want the hose to serve a broader open workspace without consuming valuable wall space.
Whatever position you choose, do the planning before the drilling.
Measure the hose path. Locate structural support. Check vehicle and garage-door clearance. Route the air supply safely. Then test the reel gradually before putting it into regular service.
A retractable reel should make your workshop feel more organized, not introduce a new obstacle course of hoses and hardware.
Mount it where the hose works for you, secure it to something that can actually support it, and give the reel enough room to do its job.