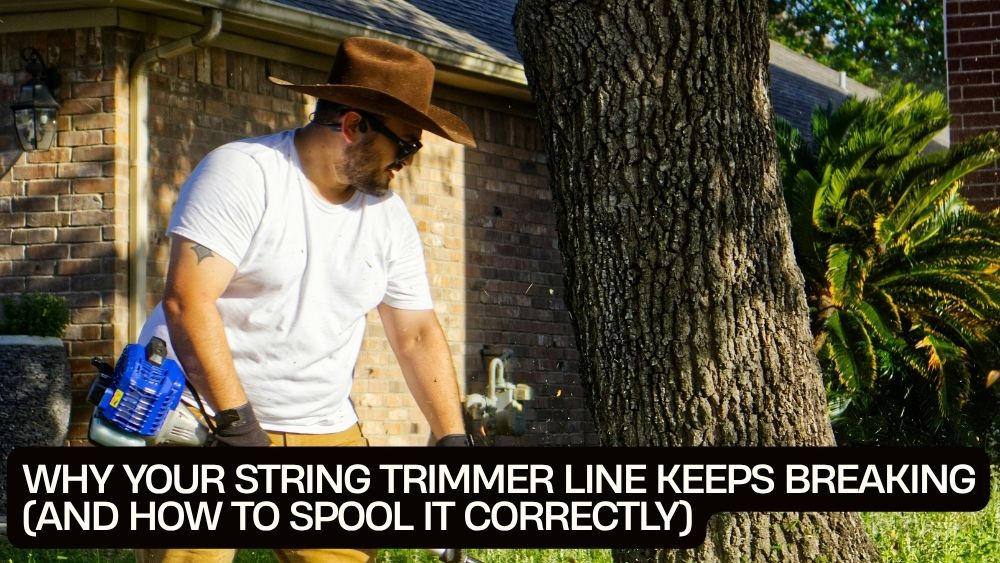
You load fresh trimmer line, start clearing the edges of your lawn, and within minutes, the line snaps again. You bump the head to feed more, keep trimming, and suddenly you're stopping for another reload. If the line keeps breaking right where it exits the trimmer head, the problem may be more than cheap string or rough handling.
When string trimmer line keeps breaking at the eyelet, the usual suspects include a worn eyelet, incorrect line diameter, brittle nylon, poor spooling, or aggressive trimming against hard surfaces. Fortunately, many of these problems are easy to diagnose without replacing the entire trimmer.
This guide explains how to find the cause, rewind a compatible spool correctly, choose the right line, and maintain your equipment for more reliable lawn care across the US and Canada.
1. Why Does String Trimmer Line Keep Breaking at the Eyelet?
The eyelet is the small opening where the trimmer line exits the cutting head. It guides the line as the head spins, but it also experiences repeated friction and vibration.
If the line repeatedly snaps at exactly this point, start by examining the eyelet and how the line passes through it.
A worn or damaged eyelet
Over time, friction can wear grooves into the eyelet or create rough edges. A damaged opening can act like a tiny blade, weakening the nylon every time the head rotates.
Turn the trimmer off and disconnect its power source before inspecting the cutting head. On a gas-powered machine, switch off the engine and allow hot components to cool.
Remove the head cover according to the manufacturer's instructions. Check the eyelet for sharp edges, cracks, deformation, and packed-in grass or dirt.
Clean away debris, but don't try to reshape a damaged eyelet with a file unless the manufacturer specifically permits it. Replace the worn component or the complete head if required.
Incorrect line diameter
Trimmer line isn't universal. A line that is too thin may wear or break too easily during demanding work. A line that's too thick may bind inside the spool, struggle to feed through the eyelet, or overload a head that wasn't designed for it.
Check the recommended line diameter in your trimmer's manual or on the head itself. Don't assume a thicker line will automatically improve cutting performance.
Line that is brittle or damaged
Old line can become brittle, especially after prolonged storage in hot or unsuitable conditions. Instead of flexing when it strikes grass or an obstacle, it may crack and snap.
If newly loaded line breaks repeatedly despite correct installation, try a fresh supply of compatible line from a reputable manufacturer.
Too much contact with hard surfaces
Concrete edging, rocks, fences, and tree trunks can wear down trimmer line rapidly. Repeatedly striking these surfaces places extra stress on the line, particularly near the point where it exits the head.
Use the outer tip of the line for cutting and edging rather than forcing the head against obstacles. Keep a controlled distance from tree bark and delicate plants.
These are common causes of line breakage and feeding problems. Manufacturer troubleshooting guidance also identifies incorrect line size, worn head components, and poor winding as issues worth checking.
2. Check the Spool Before Buying More Trimmer Line
If the line keeps breaking, replacing it repeatedly may waste money without solving the underlying problem. Inspect the spool first.
Look for these warning signs:
-
Crossed or overlapping coils that prevent the line from feeding smoothly.
-
Loose winding that allows the line to slip between layers.
-
Melted or fused sections of nylon.
-
Cracks, worn grooves, or damaged retaining slots.
-
A missing or damaged spring, cap, or bump-feed component.
-
Dirt and grass packed around the spool or eyelets.
A spool can look tidy from the outside but still contain crossed coils underneath. When the head rotates, the line may snag inside the housing instead of feeding outward. The tension can then cause the line to break near the eyelet.
If you find fused nylon, remove it and reload fresh line. Don't try to pull a welded section free by forcing the spool.
Husqvarna explains that line can fuse together inside the spool because of heat and excessive twisting during installation. It recommends following the correct winding method and replacing fused line with the specified type and diameter.
3. How to Spool String Trimmer Line Correctly
The exact loading process depends on the cutting head. Some heads use a removable spool, others allow line to be wound while the head remains attached, and some use pre-cut lengths or different loading systems.
Always follow the instructions for your particular model. For a conventional reloadable spool, the following approach covers the key principles.
Step 1: Make the trimmer safe
Switch off the engine and let the machine cool. For battery-powered equipment, remove the battery. For corded equipment, unplug it.
Wear gloves if appropriate, and keep the cutting head pointed away from your body while working.
Step 2: Open the head and inspect the parts
Remove the cover or spool using the manufacturer's method. Keep track of the spring, cap, and any small components so they can be reinstalled correctly.
Clear out old line, dirt, and grass clippings. Inspect the eyelets and spool for damage before adding new material.
Step 3: Cut the correct length of line
Use the line diameter and loading length specified by the manufacturer. Some spools accept a single length folded or secured at a designated point, while others have separate channels for two strands.
Don't fill the spool simply because extra line fits inside. Overfilling can prevent smooth feeding and cause the line to jam.
Step 4: Follow the directional arrow
Look for a winding arrow on the spool. Wind the line in the indicated direction, keeping the coils neat and even.
Incorrect winding can cause line to tangle, feed poorly, or unwind unexpectedly. The manufacturer's instructions for your specific head take priority over generic advice.
Step 5: Keep the line snug and untangled
Wind the line in even layers without crossing the strands or creating loose loops. If the head uses two channels, keep each strand in its designated section.
Avoid twisting the line excessively as you wind it. Twisted line can bind or fuse under heat during operation. Husqvarna specifically advises allowing the line to hang freely while winding rather than introducing unnecessary twists.
Step 6: Thread the ends through the eyelets
Route the line through the designated exit openings. Make sure it moves freely and isn't trapped between the spool and housing.
If the head uses two cutting ends, ensure they extend evenly unless the manufacturer's design specifies otherwise.
Step 7: Reassemble and check the head
Reinstall the spool, spring, and cover in the correct order. Confirm that the cover locks securely and that the line isn't pinched.
Pull the line gently to verify that it moves as intended. Once the head is fully assembled, follow the manual's startup and operating instructions.
Never operate a trimmer with a loose cover, missing components, or a damaged cutting head.
4. Choose the Right String Trimmer Line for Your Job
The correct line balances durability, cutting performance, and compatibility with the trimmer.
Round line for everyday trimming
Round nylon line is a common choice for routine lawn maintenance. It suits many grass-trimming tasks and is generally straightforward to load.
However, it can still break quickly when used against concrete, fencing, or thick woody growth.
Shaped line for tougher vegetation
Square, twisted, and other shaped profiles are designed to change how the line contacts and cuts vegetation. Their performance depends on the profile, diameter, head compatibility, and the type of growth you're cutting.
A more aggressive profile isn't automatically better. Confirm that the line is approved for your trimmer head before using it.
Match the diameter to the head
Your machine's manual should specify an acceptable line diameter or range. Use that guidance rather than choosing by appearance alone.
A line that doesn't fit the head correctly can cause feeding problems, increased wear, or repeated breakage.
Store spare line properly
Keep replacement line away from excessive heat and direct sunlight. Store it in a clean, sealed container according to the line manufacturer's recommendations.
If a spool has become brittle or repeatedly snaps despite correct installation, replacing it may be more practical than continuing to reload it.
5. Adjust Your Trimming Technique to Reduce Breakage
Even the correct line can wear quickly if you use it against hard surfaces or force it through heavy vegetation.
Let the tip do the cutting
The outer portion of the line moves fastest and does much of the cutting. Sweep the head steadily from side to side, taking manageable passes through tall or dense grass.
Pushing the entire head into thick growth increases resistance and can cause the line to snap.
Be careful around sidewalks and driveways
When trimming along concrete, keep the head at a controlled angle and avoid repeatedly striking the pavement. If you are edging, use the machine's approved edging position and technique.
Avoid forcing the line against fences
Wire fencing, stone walls, and metal posts can quickly damage nylon. Work carefully around these obstacles and maintain enough distance to avoid constant contact.
Use the correct cutting attachment
Don't use ordinary nylon line for vegetation or material that requires a blade or another approved attachment. If your machine supports multiple cutting tools, select the appropriate one according to its manual and the job.
6. When Should You Replace the Trimmer Head?
Sometimes, the line isn't the real problem. If fresh, correctly sized line still snaps at the eyelet after you've spooled it properly, the head may be worn or damaged.
Consider replacing the eyelet, spool, or complete head if you notice:
-
A sharp or deformed line exit opening.
-
Cracked plastic or damaged retaining tabs.
-
A bump knob that sticks or no longer feeds line correctly.
-
A missing or damaged spring.
-
Repeated line binding despite correct winding.
-
A cover that will not lock securely.
Before buying a replacement, verify the mounting connection, compatible line diameters, and approved head type for your trimmer. A head that fits physically may still be incompatible with the machine's operating requirements.
7. A Multi-Functional Gas Trimmer to Consider
If you're comparing equipment for larger yards, landscaping, or routine property maintenance, the VEVOR 43cc 6-in-1 multi-functional trimming tool is worth exploring.
The TotalFindz listing describes a gas-powered system that combines several outdoor maintenance attachments, including a string trimmer, hedge trimmer, brush cutter, edger, pole saw, and chainsaw/pruner, with an extension pole.
You can view the VEVOR 43cc 6-in-1 multi-functional trimming tool at TotalFindz.

Why consider a multi-tool system?
Multiple landscaping tasks: A multi-attachment system can reduce the need to store separate machines for every outdoor maintenance job.
Gas-powered operation: A gas-powered tool can be useful for outdoor work where access to a power outlet isn't convenient. Fuel preparation and maintenance must follow the manufacturer's instructions.
Different attachments: The supplied attachment system is designed for several types of trimming and cutting. Use only the approved attachment for the relevant task and follow its specific safety instructions.
Before purchasing, review the full listing for dimensions, included accessories, compatibility requirements, and warranty information. Don't assume every attachment uses the same cutting head or line-loading method.
For string-trimming work, identify the correct head and its recommended line size first. Proper spooling and regular inspection will help you get more consistent performance from whichever compatible equipment you choose.
8. Quick Troubleshooting Checklist
Use this checklist when your line breaks repeatedly.
| What you notice | What to check first |
|---|---|
| Line snaps flush at the eyelet | Inspect for sharp edges, grooves, or a damaged eyelet |
| Line breaks throughout the exposed length | Check line condition, diameter, and contact with hard surfaces |
| Line jams inside the head | Inspect winding direction, crossed coils, and spool fill |
| Line looks melted or fused | Remove fused line and correct winding or operating habits |
| Line won't feed after reloading | Check the spool assembly, line diameter, and head instructions |
| New line breaks immediately | Verify compatibility and inspect the head for damage |
Make one change at a time so you can identify the actual cause rather than replacing several parts unnecessarily.
Frequently Asked Questions
Why does string trimmer line keep breaking at the eyelet?
Common causes include a worn or sharp eyelet, incorrect line diameter, brittle nylon, poor winding, or repeated contact with hard surfaces. Inspect the head and verify the line specifications before replacing parts.
Should I soak trimmer line in water before using it?
Advice about soaking nylon line varies by product and manufacturer. Follow the instructions for your specific line rather than assuming every type benefits from soaking. Proper storage and using fresh, compatible line are sensible first steps.
Which direction should I wind trimmer line?
Follow the arrow on the spool or the model-specific manual. The direction varies by head, so don't assume every trimmer winds clockwise or counterclockwise.
Can thicker trimmer line stop frequent breakage?
Not necessarily. Thicker line can be incompatible with the head or machine. Use the diameter recommended by the manufacturer and address worn eyelets, poor winding, or aggressive trimming if the problem continues.
How often should I replace a trimmer head?
There is no universal replacement interval. Inspect the head regularly and replace damaged or excessively worn components. If correctly loaded line continues to break at the same point, examine the eyelet and internal parts.
Final Thoughts: Fix the Cause, Not Just the Line
When string trimmer line keeps breaking at the eyelet, don't automatically blame the replacement line. A worn opening, incorrect diameter, tangled spool, or poor trimming technique may be responsible.
Start by inspecting the eyelet and spool, then reload the line according to the correct winding direction and capacity. Use compatible line, keep the head away from hard surfaces where possible, and replace damaged parts rather than forcing them to work.
If you're shopping for a versatile landscaping tool, the VEVOR 43cc 6-in-1 system at TotalFindz is one option to consider. Pair compatible equipment with correct line selection and careful maintenance, and you'll spend less time opening the trimmer head and more time finishing the yard.