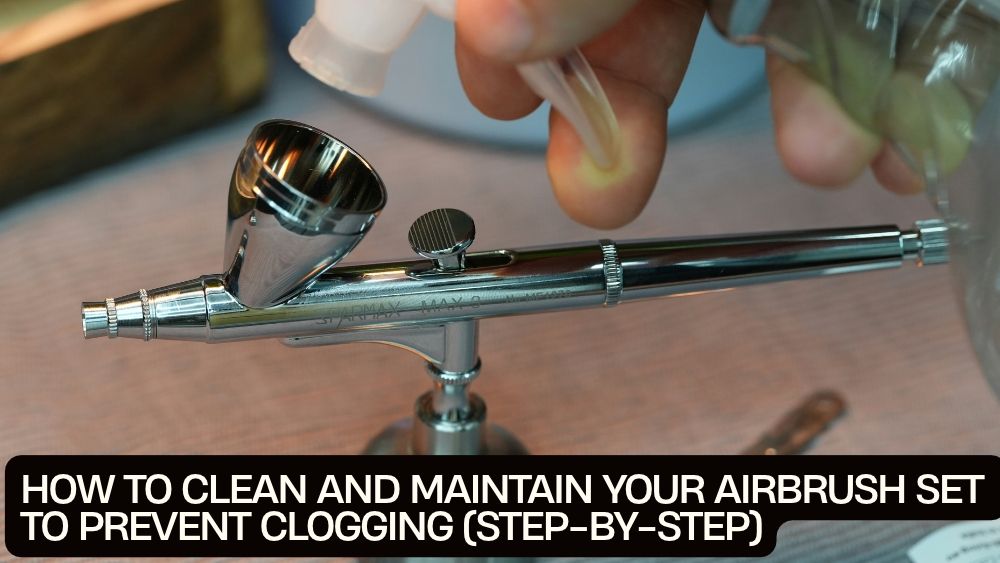
An airbrush can create smooth gradients, fine details, and beautifully even layers of color. But when dried acrylic paint starts collecting inside the nozzle, that precision can disappear fast. The spray sputters, the paint flow becomes inconsistent, and suddenly your creative session turns into a troubleshooting exercise.
The good news? Most airbrush clogs are preventable.
A simple cleaning routine helps keep paint moving through the airbrush, protects delicate parts, and makes your equipment easier to use. Whether you are painting models, creating canvas art, decorating cookies, working on nail designs, or experimenting with other airbrush projects, regular maintenance can save time and frustration.
This guide explains how to clean and maintain airbrush sets for acrylic paint, from quick color changes to a more thorough end-of-session cleanup. You will also learn how to spot common clogging problems and care for the compressor that powers your airbrush.
Why Acrylic Paint Causes Airbrush Clogs
Acrylic paint is popular because it offers vibrant color and dries relatively quickly. That same quick-drying behavior can become a problem inside an airbrush.
As water evaporates, acrylic paint begins forming a film. If paint remains in the cup, needle, nozzle, or internal paint passage, that film can build up and restrict the flow.
Common causes of clogging include:
-
Paint drying around the needle tip: This can interrupt the spray pattern or cause sputtering.
-
Paint residue inside the nozzle: Small deposits can narrow the opening.
-
Paint that is too thick: Some acrylic paints need to be thinned for airbrush use.
-
Insufficient cleaning between colors: Leftover pigment can mix with the next color or collect in the paint path.
-
Leaving paint inside the airbrush: Even a short break can allow residue to begin drying.
-
Using the wrong cleaning solution: A cleaner that is unsuitable for the paint or airbrush materials may be ineffective or damaging.
The best defense is straightforward: remove paint while it is still wet, use the right cleaner, and avoid forcing delicate parts.
What You Need Before Cleaning Your Airbrush
Gather your cleaning supplies before you start. Having everything within reach makes the process faster and reduces the chance of leaving the airbrush half-cleaned.
A basic airbrush cleaning kit may include:
-
Water or the cleaner recommended for your acrylic paint
-
A small cleaning brush
-
Cotton swabs or lint-free cloths
-
Paper towels
-
A spray-out pot or suitable container
-
A soft surface or parts tray
-
A small airbrush-compatible lubricant, if recommended by the manufacturer
A cleaning brush set is particularly useful for reaching the paint cup and internal passages. However, do not push a brush or metal tool through a nozzle if it does not fit freely. The nozzle opening is delicate, and scratching or enlarging it can affect the spray pattern.
Before using any cleaning solution, check the paint label and your airbrush manual. Water-based acrylics commonly clean up with water or a compatible airbrush cleaner, but specialty acrylics may require a specific product.
Step 1: Turn Off the Compressor and Prepare Your Workspace
Before taking the airbrush apart, make sure the equipment is safe to handle.
-
Turn off the compressor.
-
Disconnect the airbrush from the air hose.
-
Release any remaining pressure according to the compressor's instructions.
-
Place the airbrush on a clean, stable surface.
-
Keep small parts in a tray so they do not roll away.
If your compressor includes an air storage tank, follow its manual for pressure release and tank maintenance. Never loosen a pressurized fitting or remove a component while the system is under pressure.
Set up in a ventilated area. When spraying paint or cleaner, follow the product safety instructions and use suitable protection against airborne mist. A spray-out pot can help contain cleaning fluid and overspray.
Step 2: Empty the Paint Cup
Do not begin by spraying the remaining paint through the airbrush.
Instead, remove the leftover paint from the reservoir first.
For a gravity-feed airbrush:
-
Pour excess paint back into its original container only if it has not been contaminated.
-
Wipe the cup gently with a paper towel or lint-free cloth.
-
Use a damp cotton swab to remove paint around the cup's edges.
For a siphon-feed airbrush, remove the paint bottle and empty it according to the manufacturer's instructions.
Avoid letting leftover acrylic paint dry in the cup. Removing it early makes the rest of the cleaning process much easier.
Step 3: Flush the Airbrush With the Correct Cleaner
Flushing removes much of the paint remaining in the internal passages.
For water-based acrylic paint, use clean water or a compatible airbrush cleaner recommended by the paint manufacturer.
Follow these steps:
-
Add a small amount of cleaning solution to the paint cup or a clean paint bottle.
-
Gently swirl the solution around the reservoir.
-
Spray it through the airbrush into a spray-out pot or suitable absorbent material.
-
Repeat until the spray runs clear.
-
Wipe the paint cup clean.
If you are changing colors during a project, this quick flush is often enough to prepare the airbrush for the next shade.
However, clear-looking cleaning fluid does not always mean the airbrush is completely clean. Paint can remain around the needle tip or inside the nozzle, so a more thorough cleanup is still useful after your session.
Step 4: Clean the Needle Carefully
The needle is one of the most important parts of your airbrush. It controls paint flow and passes through the nozzle, so even a small amount of dried acrylic can affect performance.
For a routine end-of-session clean:
-
Disconnect the airbrush from the air supply.
-
Remove the rear handle, if your model has one.
-
Loosen the needle chucking nut according to the manual.
-
Carefully pull the needle straight out.
-
Wipe it gently with a cloth dampened with the appropriate cleaner.
Always wipe from the rear of the needle toward the sharp tip. This helps prevent the point from catching on the cloth or puncturing your fingers.
Inspect the needle under good lighting. Look for dried paint, scratches, or a bent tip. If the needle appears damaged, do not force it back into the airbrush. A bent needle can interfere with the nozzle and produce an uneven spray.
When reinstalling it, guide it gently into place. Stop when it seats naturally. Never push hard to overcome resistance.
Step 5: Clean the Nozzle and Paint Passage
The nozzle is small, but it plays a major role in creating a consistent spray. Acrylic residue around its opening can cause sputtering, uneven spray, or a complete blockage.
If your airbrush manual allows nozzle removal:
-
Remove the nozzle using the recommended method and tool.
-
Place the small parts in a safe tray.
-
Apply an appropriate cleaner to loosen paint residue.
-
Use a soft cleaning brush to remove deposits gently.
-
Clean the paint passage with a brush designed for airbrush maintenance.
-
Rinse or flush the parts as directed.
-
Allow the components to dry before reassembly.
Do not use excessive force when removing the nozzle. Some airbrush nozzles are fragile and can crack or deform if overtightened during reassembly.
Avoid using needles, pins, or other hard metal objects to scrape the nozzle opening. A scratch or change in its shape can affect airflow and paint atomization.
Also, never soak the entire airbrush body in cleaner. Cleaning fluid may damage seals, internal components, or finishes. Soak only the removable parts that the manufacturer identifies as safe to soak, and follow the recommended time limit.
Step 6: Reassemble and Test the Airbrush
Once the parts are clean and dry, reassemble the airbrush carefully.
-
Insert the needle gently until it seats.
-
Tighten the needle chucking nut only as instructed.
-
Reinstall the nozzle and caps without overtightening.
-
Attach the air hose.
-
Add clean water or a suitable test fluid to the paint cup.
-
Test the spray pattern.
Look for a steady spray without unexpected sputtering, pulsing, or irregular flow.
If the airbrush still does not spray correctly, do not immediately increase pressure or force more cleaner through it. Check the needle position, nozzle assembly, paint consistency, and air supply. Persistent problems may require additional cleaning or professional service.
Step 7: Prevent Clogs While You Work
Cleaning at the end of a session is important, but a few habits during painting can prevent many clogs from forming in the first place.
Keep the needle tip clean
Acrylic paint can dry around the needle tip while you work. Inspect it regularly and gently remove visible buildup using a compatible cleaner and a soft cloth or swab.
Avoid touching or bending the needle.
Flush between color changes
When switching colors, empty the cup and flush the airbrush until the cleaner runs clear. This is especially useful when moving between contrasting colors or using paints with a high pigment load.
Use paint made for airbrushing
Some acrylic paints are formulated for airbrush use, while others may need thinning. Follow the paint manufacturer's guidance rather than assuming every acrylic can be sprayed directly.
If paint is too thick, it may clog the nozzle or produce a rough spray. If it is thinned too much, it may become difficult to control or cover the surface evenly.
Do not leave paint sitting in the cup
If you need to pause, remove the paint and flush the airbrush before the acrylic starts drying. A short break can become a long cleanup if paint is left to sit.
Step 8: Maintain the Compressor and Air Hose
Your airbrush is only one part of the system. The compressor, hose, and moisture-control components also need attention.
For a compressor with an air storage tank, follow the manufacturer's maintenance schedule. Depending on the design, this may include checking connections, inspecting the hose, and draining collected moisture from the tank or moisture trap.
Before each session, look for:
-
Damaged or kinked air hoses
-
Loose connections
-
Unusual compressor noise
-
Visible moisture in the air line
-
A damaged power cord or plug
-
Pressure readings that behave unexpectedly
If your compressor includes a moisture trap, inspect and maintain it according to its manual. Moisture entering the airbrush can interfere with paint application, particularly in humid conditions.
Do not open the compressor housing or attempt electrical repairs unless you are qualified to do so. Disconnect power before carrying out any maintenance permitted by the manufacturer.
Step 9: Store Your Airbrush Properly
Once the airbrush is clean, dry, and tested, store it where it will be protected from dust and accidental damage.
A few good habits make a difference:
-
Keep the needle protected.
-
Store small components in a parts tray or case.
-
Do not leave cleaning solution inside the paint cup.
-
Avoid storing the airbrush where it can fall or get crushed.
-
Keep paint bottles sealed and away from excessive heat.
-
Store cleaning products according to their labels.
If your airbrush requires lubrication, use only a product approved for that model. Apply a small amount in the specified location. Too much lubricant can interfere with paint flow, and some oils may be incompatible with seals or paint.
Choosing an Airbrush Kit for Easier Maintenance
A well-organized kit can make cleaning less of a chore. Look for an airbrush set that includes useful accessories, clear instructions, and components that are easy to access for routine care.
The VEVOR Airbrush Kit with Dual-Fan Air Tank Compressor System is one option for artists looking for an airbrush and compressor setup. The listed kit includes a 3.5L air storage tank, a 0.3 mm airbrush tip, an airbrush holder, a color-mixing wheel, and a cleaning brush set.
The included cleaning brushes can help with routine maintenance, but they do not replace the correct cleaning solution or careful handling. Always check the kit's instructions for compatible paint types, cleaning procedures, and compressor maintenance.
Common Airbrush Cleaning Mistakes to Avoid
A few shortcuts can make clogs worse or damage the equipment.
| Mistake | Why It Causes Problems | Better Approach |
|---|---|---|
| Leaving acrylic paint in the cup | Paint can dry and form deposits | Empty and flush promptly |
| Using an unsuitable solvent | Cleaner may be ineffective or damage seals | Follow paint and airbrush instructions |
| Forcing a needle into the nozzle | Can bend the needle or damage the nozzle | Insert gently and stop at natural resistance |
| Scraping the nozzle with metal tools | May scratch or deform the opening | Use a compatible soft brush |
| Soaking the whole airbrush | May damage seals and internal parts | Clean only approved removable components |
| Overtightening small parts | Can crack or strip delicate components | Tighten as directed by the manufacturer |
| Ignoring compressor moisture | Can affect spray consistency | Maintain the tank and moisture trap as instructed |
Frequently Asked Questions
How often should I clean my airbrush?
Flush your airbrush between color changes and perform a thorough cleaning after each painting session. If you notice sputtering, inconsistent flow, or paint buildup around the needle, clean it before continuing.
Can I clean an airbrush with water?
Water is often suitable for water-based acrylic paints, especially when the paint is still wet. Some acrylic formulations require a dedicated airbrush cleaner, so check the paint label or manufacturer's instructions.
Why does my airbrush keep clogging with acrylic paint?
Common causes include paint that is too thick, dried paint around the needle tip, residue inside the nozzle, or insufficient cleaning. Check paint consistency and clean the paint path before assuming the airbrush is defective.
Can I leave my airbrush soaking overnight?
Do not assume that soaking is safe. Prolonged exposure to cleaning solutions can damage some seals and components. Follow the airbrush manufacturer's instructions and soak only approved removable parts for the recommended period.
What should I do if my airbrush still will not spray?
Disconnect the air supply and inspect the needle, nozzle, paint passage, and hose connections. Check that the needle is seated correctly and that the paint is suitable for airbrush use. If the problem continues, consult the manual or a qualified service professional.
Final Thoughts: Make Cleaning Part of Your Painting Routine
A clean airbrush is easier to control, more reliable, and less likely to interrupt your creative work. The secret is not a complicated maintenance ritual. It is a consistent routine.
Empty the paint cup. Flush the airbrush with the correct cleaner. Wipe the needle carefully. Clean the nozzle and paint passage when needed. Test the spray before storing the equipment, and maintain the compressor according to its instructions.
Most importantly, do not let acrylic paint dry inside your airbrush.
A few minutes of cleaning after each session can prevent frustrating clogs and help your airbrush set stay ready for the next project.