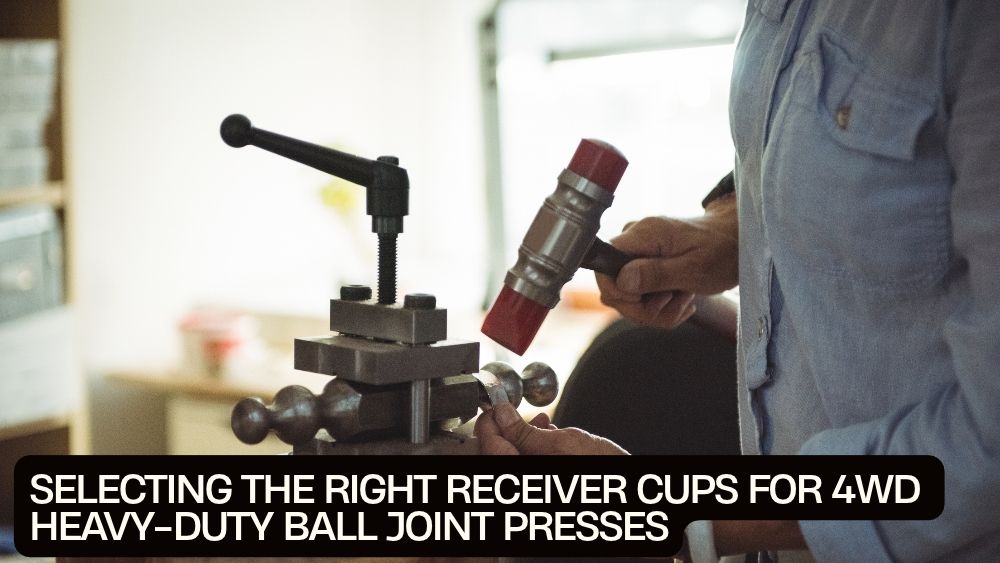
A stubborn ball joint can turn a routine 4WD repair into a wrestling match. The right press makes the job more controlled, but there’s a detail that matters just as much as the C-frame itself: choosing the correct receiver cup.
A receiver cup that is too small may contact the ball joint or stud when it should clear it. One that is too large may sit awkwardly against the knuckle or control arm. And a cup with the wrong depth can run out of room before the joint is fully removed.
For owners and mechanics working on solid-axle 4WDs, the answer is not simply to grab the biggest cup in the kit. It is to match the adapter’s inside diameter, outside diameter, depth, contact surface, and position to the specific ball joint and axle assembly.
This guide explains how to select receiver cups, how to use a ball joint adapter cup size chart for 4WD solid axle work, and what to inspect before applying press force.
Why Receiver Cup Selection Matters on a 4WD Solid Axle
A ball joint press uses a forcing screw and C-frame to apply controlled pressure. During removal, the receiver cup provides clearance for the joint as it moves out of its bore. During installation, the adapter or cup supports the surrounding component while the replacement joint is pressed into position.
That means the cup is not just a spacer. It helps determine whether the force travels through the intended surfaces.
A poor fit can lead to:
-
The receiver cup contacting the ball joint instead of clearing it
-
The cup resting on an uneven or angled surface
-
The press becoming misaligned as pressure increases
-
The joint binding partway through removal or installation
-
Damage to the knuckle, joint housing, press, or adapter
4WD solid-axle service can also differ from common control-arm ball joint work. Some applications use dedicated 4WD receiving cups and installation adapters, and some procedures require a particular removal or installation order.
For example, certain Dana 44 service procedures specify removing the lower ball joint before the upper one, then installing the lower joint first. That is not a universal rule for every axle. Use the vehicle or axle manufacturer’s service procedure for the exact application.
What Does a Receiver Cup Actually Do?
A receiver cup is a hollow adapter that creates space for a pressed component to move into during removal. It may also provide a supporting surface for certain installation operations, depending on the press kit and procedure.
The key is understanding the difference between the main dimensions.
| Dimension | What it means | Why it matters |
|---|---|---|
| Inside diameter (I.D.) | The opening through the cup | Must clear the part moving into or through the cup |
| Outside diameter (O.D.) | The cup’s overall width | Must fit against the surrounding knuckle or press area |
| Depth / height | How far the cup extends | Must provide enough travel and clearance |
| Contact face | The surface that touches the workpiece | Must sit securely and avoid damaging nearby parts |
| Shape | Straight, stepped, recessed, or contoured | Must match the joint and the available space |
A cup can have a suitable I.D. but still be wrong for the job. If its O.D. is too wide, it may collide with the axle knuckle. If its depth is too short, the joint may bottom out before it is free.
Ball Joint Adapter Cup Size Chart for 4WD Solid Axle Work
There is no single universal receiver-cup size chart that safely fits every 4WD solid axle. Axle design, joint dimensions, knuckle shape, and press-kit geometry vary by vehicle and application.
The chart below is a selection guide, not a vehicle-specific fitment table. Use it to identify the dimensions you need to verify before choosing a cup.
| Check | What to measure or confirm | Selection goal |
|---|---|---|
| Ball joint housing | Outside diameter of the housing being removed | Receiver I.D. clears the housing throughout its travel |
| Joint movement path | Diameter of the portion entering the receiver | No interference as the joint moves |
| Knuckle or control-arm surface | Available flat contact area | Cup O.D. sits securely without contacting nearby features |
| Required press travel | Distance the joint must move to release or seat | Cup depth accommodates the movement |
| Press alignment | C-frame, screw, adapter, and cup centerlines | Components remain aligned under load |
| Application | Axle type, vehicle year, model, and joint position | Correct procedure and application-specific adapters are used |
A practical example: the clearance principle
Suppose the ball joint housing measures approximately 1.90 inches across. A receiver with an I.D. close to that measurement may not provide enough clearance once tolerances, coatings, or a slightly irregular housing are considered.
You would need to compare the joint’s actual dimensions with the receiver opening and verify that the cup can sit correctly against the surrounding assembly.
Do not treat a sample measurement as a recommendation for your truck. The required clearance and support arrangement depend on the joint design and the tool manufacturer’s instructions.
How to Measure for the Correct Receiver Cup
Before selecting an adapter, clean the work area and identify the exact joint you are servicing. Rust, dirt, and grease can disguise the joint’s actual shape.
1. Identify the axle and ball joint application
Start with the vehicle’s year, make, model, drivetrain, and axle type. If the vehicle has been modified, verify the axle itself rather than relying only on the original vehicle information.
Confirm whether the job involves the upper or lower ball joint. The two positions may use different adapters or have different clearance requirements.
2. Measure the joint housing
Use a suitable measuring tool to check the outside diameter of the ball joint housing. Measure the section that will move into the receiver during removal.
Do not measure only the stud or the dust boot. Those dimensions do not tell you how much room the housing needs.
3. Check the receiver’s inside diameter
The receiver’s opening must provide clearance for the part moving into it. Look for possible interference from:
-
The joint housing
-
The stud or threaded end
-
A flange or shoulder
-
A grease fitting
-
A snap ring or other retaining feature
The joint should not be forced against the receiver wall as it moves.
4. Check the outside diameter and contact area
Next, make sure the cup can sit against the intended support surface without contacting nearby parts.
On a solid axle, the knuckle may have angled surfaces, ribs, or limited flat areas. A cup that appears to fit on the bench may not sit properly once the press is assembled around the axle.
5. Confirm depth and travel
The receiver needs enough internal space for the joint to move through the required distance. Check the cup depth against the joint’s travel and the arrangement shown in the service instructions.
If the joint bottoms out inside the cup before it releases, stop. Do not continue tightening the press in an attempt to force the issue.
Removal Cups and Installation Adapters Are Not Always Interchangeable
One common mistake is assuming that any hollow cup can be used for both removal and installation.
During removal, the receiver generally needs to clear the joint as it exits the bore. During installation, the tool must press on the intended part of the new joint while supporting the surrounding component correctly.
A dedicated installing adapter may contact a specific shoulder or flange. A receiver cup designed for removal may not provide that contact surface.
Before pressing a new joint in, verify:
-
The joint is oriented correctly.
-
The bore and mating surfaces are prepared as directed.
-
The adapter contacts the intended surface.
-
The press is centered and aligned.
-
The joint enters the bore straight.
-
The final seating position matches the service procedure.
Never press against a dust boot, grease fitting, or other component that is not designed to carry the installation load.
Common Receiver Cup Mistakes to Avoid
Choosing by outside diameter alone
A cup may fit around the outside of the knuckle but have an opening that is too small for the ball joint to pass into. Compare I.D., O.D., and depth as a set.
Using a cup that rocks or sits at an angle
A cup that does not sit securely can shift as pressure rises. Stop and reassess the setup rather than trying to hold a poorly seated adapter in place under load.
Ignoring the press’s alignment
The C-frame, forcing screw, adapters, and receiver should form a straight, stable assembly. If the setup begins to tilt or walk, release the load and correct the alignment.
Continuing when the joint will not move
A stuck joint may be retained by a snap ring, corrosion, a press-fit shoulder, or another application-specific feature. Confirm that all required retainers have been removed and that the correct procedure is being followed.
More force is not a substitute for identifying the reason a joint is stuck.
Assuming a “universal” kit covers every axle
A kit may support many common applications without covering every solid axle, aftermarket ball joint, or modified 4WD. Check the tool’s application guide and compare the actual adapter dimensions before starting.
Using a Ball Joint Press Kit for 4WD Service
A kit such as the VEVOR 25-piece ball joint press kit can be a useful option for automotive repair work when its included adapters match the application.
The important step is checking the contents and dimensions against the vehicle’s service instructions. A piece count alone does not confirm compatibility with a particular solid axle.
Before using any press kit:
-
Read the tool manufacturer’s instructions.
-
Inspect the C-frame, forcing screw, cups, and adapters for cracks, deformation, or damaged threads.
-
Confirm the correct receiver and installing adapter for the joint.
-
Lubricate the forcing screw only as directed by the tool manufacturer.
-
Position the press so the components are centered and aligned.
-
Apply force gradually while watching for movement or misalignment.
-
Stop if the cup shifts, the press bends, or the joint binds unexpectedly.
Wear appropriate eye protection and keep your body out of the likely path of a component that could release suddenly. Never use an impact tool on the forcing screw unless the press manufacturer specifically approves it.
Safety Notes for Heavy-Duty Ball Joint Pressing
Ball joint presses store substantial force. A component that releases unexpectedly can cause serious injury or damage.
Before working on the vehicle, secure it using the correct lifting and support equipment. Follow the vehicle service manual for removal of the knuckle, axle components, and retainers. Do not rely on a jack alone to support a vehicle.
During pressing:
-
Keep hands clear of the press and loaded components.
-
Do not use damaged or improvised adapters.
-
Do not exceed the press or adapter’s stated capacity.
-
Do not heat a loaded press assembly.
-
Stop if the C-frame, screw, or cup begins to deform.
-
Release pressure before repositioning the tooling.
If the setup does not fit the axle cleanly, use an application-specific tool or consult a qualified technician. A receiver cup should not need to be held in place by hand while the press is under load.
Frequently Asked Questions
Is there one receiver cup size for all 4WD solid axles?
No. Ball joint dimensions, knuckle geometry, and adapter arrangements vary. Use the vehicle or axle service information and the press-kit application chart to determine the correct cup.
Should the receiver cup be larger than the ball joint?
For removal, the receiver generally needs enough inside clearance for the joint housing to move into it. But the correct size also depends on the available support surface and cup depth. Do not choose based on I.D. alone.
Can I use the same cup for upper and lower ball joints?
Not necessarily. Upper and lower joints may require different adapters or different press arrangements. Check the application-specific instructions.
What if the cup fits the joint but not the knuckle?
Do not force the setup. The cup must both clear the moving part and sit securely against the intended support surface. Find the correct adapter for the application.
Can I use a ball joint press on a solid axle without removing the knuckle?
Some tool kits are designed for certain in-place service applications, while other procedures require the knuckle to be removed. Follow the vehicle’s service manual and the press manufacturer’s instructions.
The Right Cup Makes the Pressing Job More Controlled
Selecting a receiver cup is about more than finding a hollow cylinder that seems to fit. The right adapter provides the necessary clearance, supports the intended surface, accommodates the joint’s travel, and keeps the press aligned.
For 4WD solid-axle repairs, begin with the axle and joint application. Measure the housing, verify the receiver’s inside and outside diameters, check depth, and confirm the correct removal or installation arrangement.
A ball joint adapter cup size chart for 4WD solid axle work is most useful when treated as a measurement checklist, not a universal promise of fitment. Match the chart to the actual joint and service procedure, and stop if the press begins to shift or bind.
That little pause can prevent a much bigger repair.