Choosing an adjustable trailer hitch is easy. Choosing the correct height is where things get interesting.
If your trailer sits nose-up or nose-down after connecting it to your truck or SUV, the hitch may have the wrong rise or drop setting. That uneven connection can affect weight distribution, towing stability, and tire wear. It can also make a perfectly good towing setup feel uncomfortable on the road.
The good news? You don't need complicated equipment to find the right adjustment. A tape measure, a level surface, and a few minutes of measuring can help you determine exactly how much rise or drop your trailer needs.
Whether you're towing a utility trailer, camper, boat trailer, enclosed cargo trailer, or equipment hauler, this guide explains how to measure rise or drop for an adjustable trailer hitch using a straightforward step-by-step process.
We'll also cover common measuring mistakes, how to set the hitch correctly, and what to check before towing.
What Are Trailer Hitch Rise and Drop?
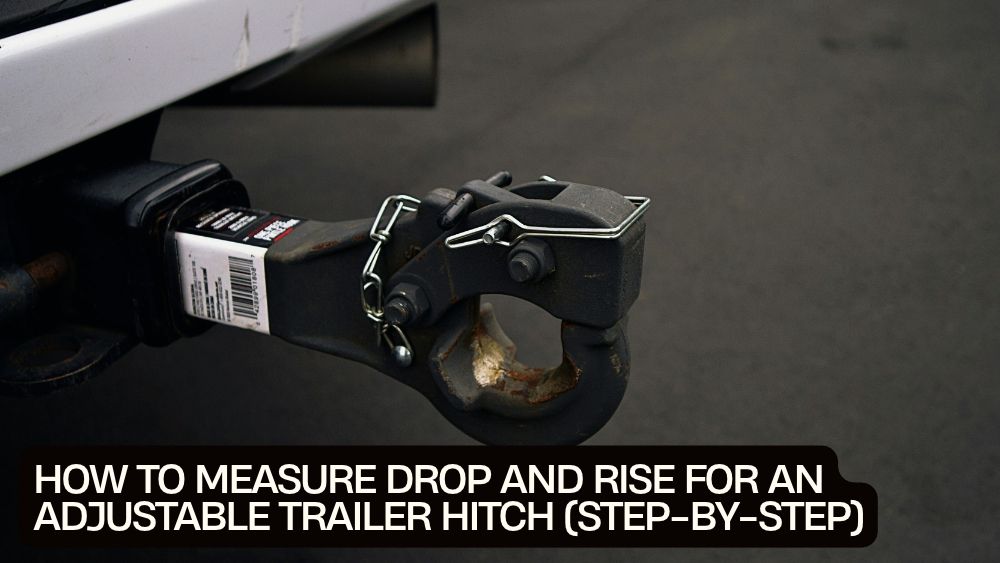
Rise and drop describe how much a trailer ball mount raises or lowers the hitch ball relative to the tow vehicle's receiver.
The purpose is simple: position the hitch ball at the correct height so the connected trailer sits approximately level when loaded for towing.
What is hitch drop?
Drop is the vertical distance the hitch ball needs to move downward relative to the receiver.
You typically need a drop when the tow vehicle's receiver sits higher than the trailer's coupler.
For example, lifted trucks and some larger SUVs often have higher receiver heights than the trailers they tow.
What is hitch rise?
Rise is the vertical distance the hitch ball needs to move upward relative to the receiver.
You need rise when the trailer's level coupler sits higher than the tow vehicle's receiver.
This situation can occur with certain taller trailers, lower tow vehicles, or different vehicle-trailer combinations.
Why does the correct height matter?
A properly adjusted hitch helps the trailer travel at its intended angle.
Incorrect height can contribute to:
-
Uneven loading across trailer axles
-
Changes in tongue weight distribution
-
Poor towing stability
-
Increased stress on certain trailer components
-
Reduced ground clearance or excessive rear clearance issues
The goal is not simply to make the trailer look level while parked. You want the connected vehicle and trailer to sit correctly under their actual towing conditions.
Tools You'll Need Before Measuring
You don't need a professional workshop to measure trailer hitch rise or drop.
Gather these basic tools:
| Tool | Purpose |
|---|---|
| Tape measure | Measures receiver and coupler heights |
| Bubble level | Confirms the trailer frame is level |
| Pen and paper | Records measurements |
| Wheel chocks | Prevents unintended trailer movement |
| Jack or tongue jack | Adjusts trailer height while measuring |
| Helper (optional) | Makes measuring longer trailers easier |
A digital angle finder can also help check trailer-frame alignment, but a basic bubble level is usually sufficient.
Important: Park both the tow vehicle and trailer on firm, level ground. Measurements taken on a sloped driveway can produce misleading results.
Step 1: Park the Tow Vehicle on Level Ground
Start with your truck, SUV, or other tow vehicle.
Park it on a reasonably flat surface and make sure the suspension is sitting in its normal towing configuration.
If you normally tow with cargo, passengers, tools, or equipment in the vehicle, account for that load when checking the final setup. Added weight can change rear suspension height and receiver position.
Set the parking brake and secure the vehicle before measuring.
For your initial measurement, identify the hitch receiver opening at the back of the vehicle.
Step 2: Measure the Tow Vehicle's Receiver Height
Take your tape measure and measure vertically from the ground to the top inside edge of the receiver tube opening.
This is your receiver height.
Record the measurement.
For example:
Receiver height = 21 inches
Be consistent about the reference point. Measuring to the bottom of the receiver instead of the top inside edge can introduce an error into your calculation.
Also make sure the tape measure is vertical rather than following the angle of the bumper or hitch assembly.
Step 3: Level the Trailer Before Measuring Its Coupler
Next, position the trailer on the same level surface, disconnected from the tow vehicle.
Use the trailer tongue jack to raise or lower the front until the trailer frame is level.
Place your bubble level on a suitable straight section of the trailer frame near the tongue. Follow the trailer manufacturer's guidance if it specifies a different reference surface.
Once the trailer is level, secure it with wheel chocks.
This step matters because a trailer sitting nose-up or nose-down will give you an incorrect coupler measurement.
You want to measure the height at which the trailer is designed to sit when level, not its current position on the driveway.
Step 4: Measure the Trailer Coupler Height
With the trailer level, measure vertically from the ground to the bottom inside edge of the trailer coupler, using the reference point specified by your chosen measuring method.
Record the result.
For example:
Trailer coupler height = 16 inches
Keep the trailer level while taking the measurement. If the tongue jack moves or the trailer shifts, check the level again.
One important detail: manufacturer guides sometimes use slightly different reference points when explaining hitch and coupler measurements. Follow one consistent measurement method and account for the ball and coupler geometry specified by the hitch manufacturer. Do not mix measurements taken from different reference points.
Step 5: Calculate the Required Rise or Drop
Now comes the easy part.
Compare the receiver height with the level trailer coupler height.
For this guide, use:
Required height difference = Receiver height − Coupler height
The result tells you whether you need a drop or rise.
Example A: You need a drop
-
Receiver height: 21 inches
-
Coupler height: 16 inches
-
Difference: 21 − 16 = 5 inches
The receiver is higher than the trailer coupler, so the hitch ball needs to be positioned lower.
Example B: You need a rise
-
Receiver height: 17 inches
-
Coupler height: 20 inches
-
Difference: 17 − 20 = -3 inches
The trailer coupler is higher than the receiver, so the hitch ball needs to be positioned higher.
These examples illustrate the basic height comparison. The final ball-height setting must account for the actual ball mount geometry and the manufacturer's measurement instructions.
CURT and etrailer both explain the same fundamental principle: compare receiver height with the level trailer coupler height to establish the required rise or drop. (CURT measuring guide, etrailer measuring guide)
Step 6: Choose an Adjustable Hitch With the Correct Range
Once you know your required height difference, select an adjustable hitch that can accommodate it.
Do not choose a hitch based only on its maximum drop or rise number. Check the actual adjustment range and the manufacturer's specified measurement reference.
For example, a hitch advertised with an 8-inch drop and rise capability may offer a range suitable for several vehicle-trailer combinations. However, the advertised maximum does not guarantee that every position is approved for every load.
The VEVOR adjustable trailer hitch with triple ball mount is listed with:
-
2.5-inch receiver compatibility
-
Up to 8-inch drop/rise adjustment
-
Triple-ball configuration
-
Advertised towing capacity of 18,500 lb
These specifications make it worth considering for compatible towing setups that need adjustable height and different ball-size options.
Before purchasing, verify the exact adjustment range, ball sizes, receiver compatibility, pin requirements, and rated capacity in the product documentation. The product's advertised maximum towing figure is not a guarantee that your vehicle or trailer can tow that amount.
Step 7: Install and Adjust the Hitch
After selecting a compatible adjustable hitch, follow the manufacturer's installation instructions.
A typical setup involves:
-
Confirming that the hitch shank matches the receiver size.
-
Inserting the shank fully into the receiver.
-
Aligning the pin holes.
-
Installing the specified hitch pin and retainer.
-
Selecting the correct ball size for the trailer coupler.
-
Positioning the adjustable ball mount at the required height.
-
Securing all adjustment pins and retaining clips.
If the hitch is reversible, check whether the manufacturer permits it to be flipped for additional rise or drop. Never assume that every adjustable hitch can safely operate in both orientations.
Use only the supplied or specified hardware. Do not substitute ordinary bolts or pins for rated hitch hardware.
Step 8: Connect the Trailer and Check Its Position
With the height adjustment complete, connect the trailer according to the coupler manufacturer's instructions.
Lower the coupler onto the correct hitch ball, secure its latch, and attach the safety chains and electrical connection.
Before towing, inspect the connected trailer from the side.
Look for:
-
A trailer frame that sits approximately level
-
A coupler that is properly seated and latched
-
Adequate ground clearance
-
No contact between the trailer and vehicle
-
Secure hitch pins and retainers
-
Correct safety-chain attachment
-
Properly connected trailer lights and brakes
If the trailer is noticeably nose-up or nose-down, reassess the hitch height and measurement references.
Step 9: Recheck the Setup Under Actual Towing Load
An unloaded measurement is a starting point, not the entire story.
Cargo, passengers, tongue weight, and suspension movement can change the final towing attitude.
For a more accurate setup:
-
Load the tow vehicle as it will normally be used.
-
Load the trailer as it will be towed.
-
Measure the connected combination on level ground.
-
Check the trailer frame and tow vehicle stance.
-
Adjust the hitch if needed, within its approved range.
Do not use hitch height to compensate for an overloaded vehicle or improperly loaded trailer. Confirm the trailer's actual weight and tongue weight using suitable scales and stay within all rated limits.
Common Mistakes When Measuring Trailer Hitch Rise and Drop
Even a simple measurement can go wrong when the reference points are inconsistent.
1. Measuring the trailer while it is tilted
A trailer sitting nose-up or nose-down will produce an inaccurate coupler height.
Fix: Level the trailer before measuring.
2. Measuring the wrong receiver point
Measuring to the bumper, bottom of the receiver, or another convenient surface can distort the result.
Fix: Use the top inside edge of the receiver opening when following the common receiver-height method.
3. Forgetting vehicle cargo
Heavy cargo in the rear of a truck can lower the receiver and change the final setup.
Fix: Check the vehicle in its normal towing configuration.
4. Choosing a hitch based only on advertised capacity
A large towing-capacity number does not confirm compatibility with your receiver, ball, trailer coupler, or vehicle.
Fix: Check every component's rating and compatibility.
5. Ignoring ball size
A hitch can have the correct height but the wrong ball diameter for the trailer coupler.
Fix: Confirm the required ball size before connecting.
6. Assuming the maximum drop equals the usable adjustment at every position
Some adjustable hitches have different limits depending on orientation, ball attachment, or configuration.
Fix: Follow the hitch manufacturer's rated-position chart.
Rise and Drop Measurement Checklist
Before buying or adjusting an adjustable trailer hitch, run through this quick checklist:
-
Tow vehicle parked on level ground
-
Vehicle loaded as appropriate for towing
-
Receiver height measured correctly
-
Trailer parked on level ground
-
Trailer frame confirmed level
-
Coupler height measured consistently
-
Required rise or drop calculated
-
Adjustable hitch range verified
-
Receiver size confirmed
-
Correct hitch-ball diameter selected
-
All component weight ratings checked
-
Pins, clips, coupler latch, and safety chains inspected
-
Final connected trailer attitude checked
Frequently Asked Questions
How do I know if I need a rise or a drop hitch?
Compare the tow vehicle's receiver height with the height of the trailer coupler when the trailer is level. If the receiver is higher, you generally need drop. If the trailer coupler is higher, you generally need rise.
How much drop do I need for a lifted truck?
There is no universal drop measurement for lifted trucks. Measure the actual receiver height and the level trailer coupler height. The difference determines the starting drop requirement.
Can I flip an adjustable trailer hitch upside down?
Some adjustable hitches are designed to operate in both rise and drop orientations. Others have restrictions. Check the manufacturer's instructions and weight ratings before reversing the shank or ball mount.
Should my trailer be perfectly level when towing?
The correct towing attitude depends on the trailer manufacturer's specifications. Many conventional trailers are designed to tow approximately level, but some applications have specific setup requirements. Follow the trailer manufacturer's guidance.
Does an 8-inch drop mean I can tow any trailer that needs an 8-inch drop?
No. The adjustment range only describes the available height movement. You must also verify receiver fit, ball size, component ratings, mounting orientation, and vehicle towing limits.
Is the hitch's advertised towing capacity the maximum I can tow?
Not necessarily. The actual permitted towing capacity is limited by the lowest-rated component and the vehicle manufacturer's towing and payload limits. The trailer, coupler, hitch ball, ball mount, receiver, and tow vehicle all matter.
Final Thoughts: Measure First, Adjust Second, Tow Safely
Getting the right trailer hitch height does not require guesswork.
Measure the tow vehicle's receiver, level the trailer, measure the coupler, and calculate the difference. Then select an adjustable hitch that provides the required adjustment within its approved configuration.
A product such as the VEVOR triple-ball adjustable trailer hitch can offer useful flexibility when its receiver size, ball options, height range, and ratings match your towing setup.
Most importantly, do not stop at the measurement. Check the loaded trailer attitude, verify every weight rating, secure the connection, and follow the vehicle and trailer manufacturers' instructions.
A few careful measurements before departure can make the difference between a frustrating towing setup and a properly matched combination.